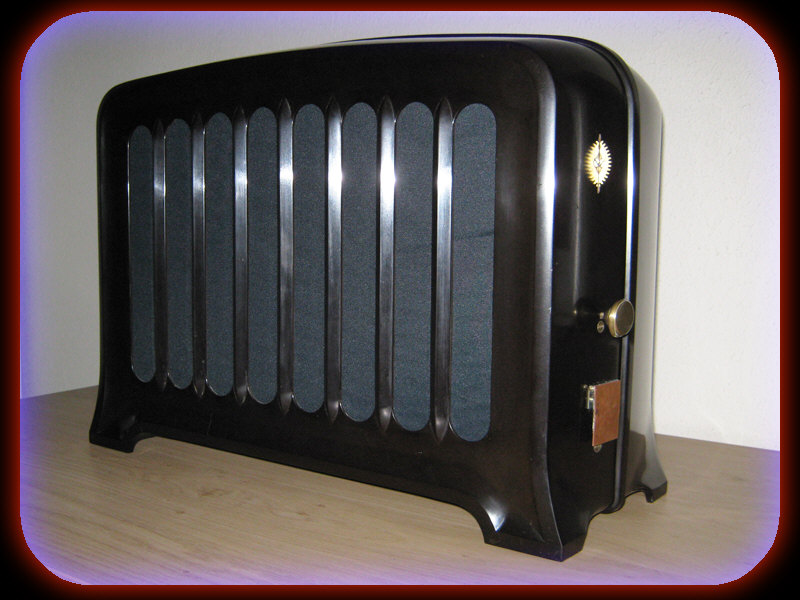
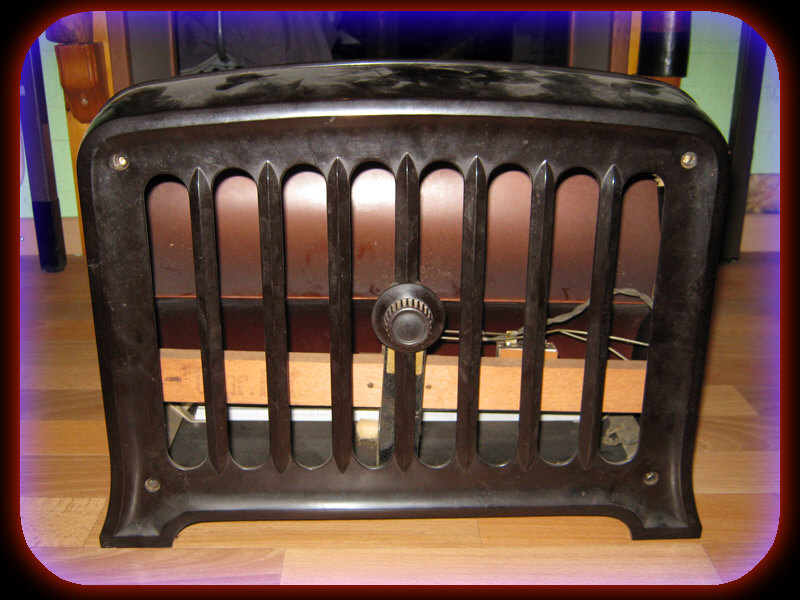
A simple and elegant radio that is playing your favorite songs of choice
|
A simple and elegant radio that is playing your favorite songs of choice |
An old "Creative MuVo Tx" mp3-player, a
left-over Power Supply Unit (PSU) of a desktop computer long
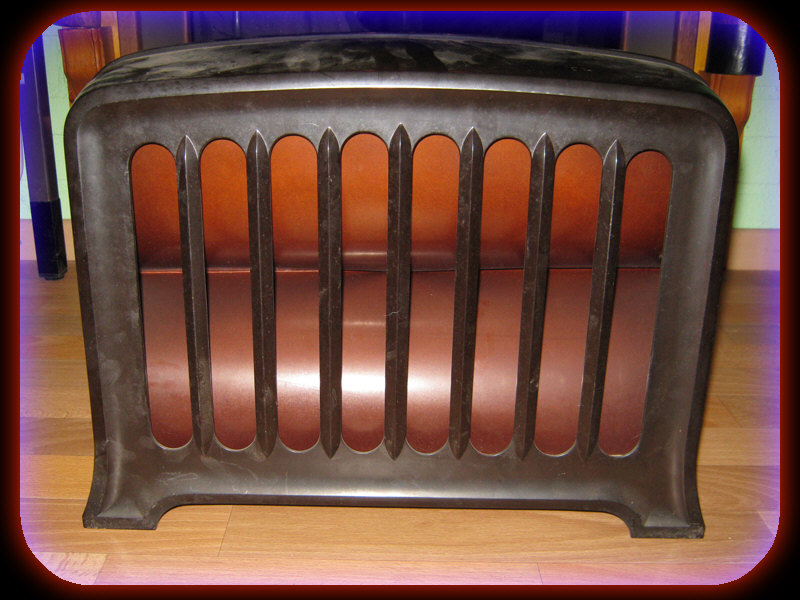
gone, and a Telefunken Sihaphon 52 loudspeaker from 1929
that I found on my parent's attic have found a second life
in a symbiotic relationship.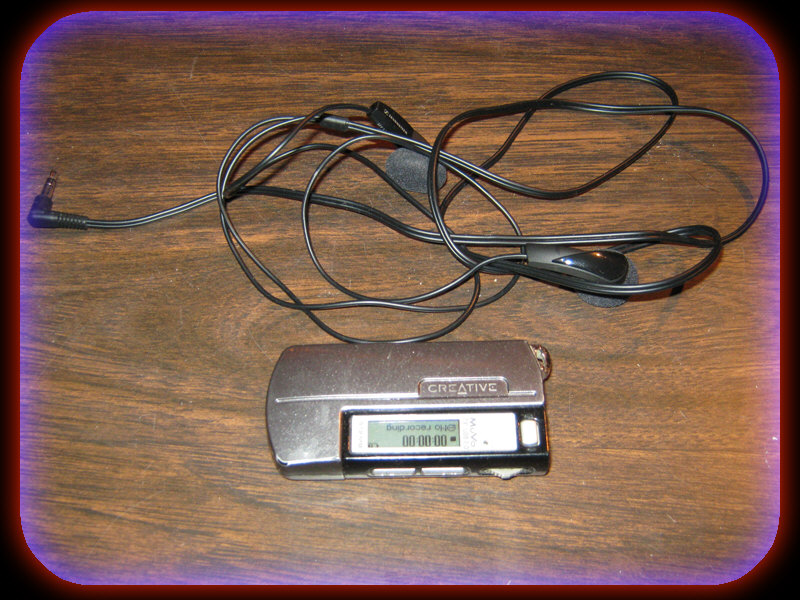 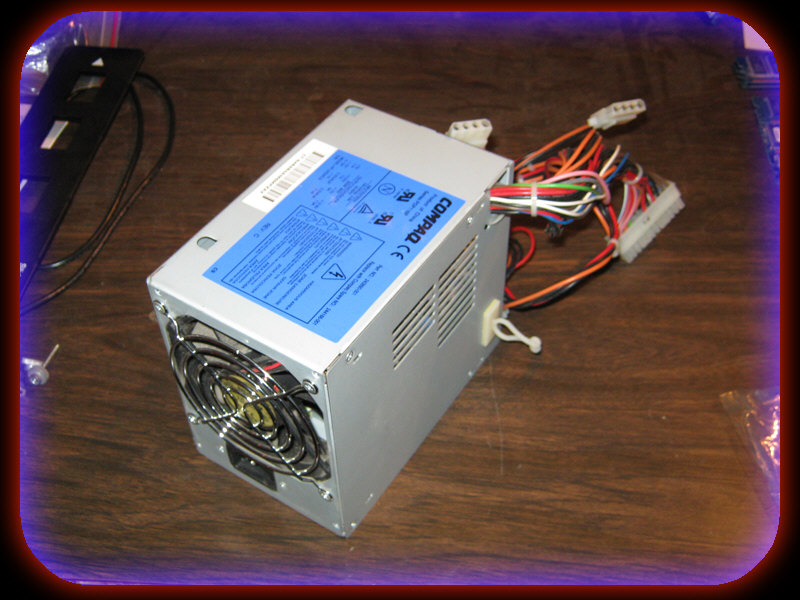 |
||
  |
||
| The basic idea is to install the mp3-player inside the loudspeaker and let it play your favorite music. | ||
 For this to
become reality a number of issues needed to be
addressed. I needed an audio amplifier and an extra
speaker because the original one didn't work properly
anymore. For this to
become reality a number of issues needed to be
addressed. I needed an audio amplifier and an extra
speaker because the original one didn't work properly
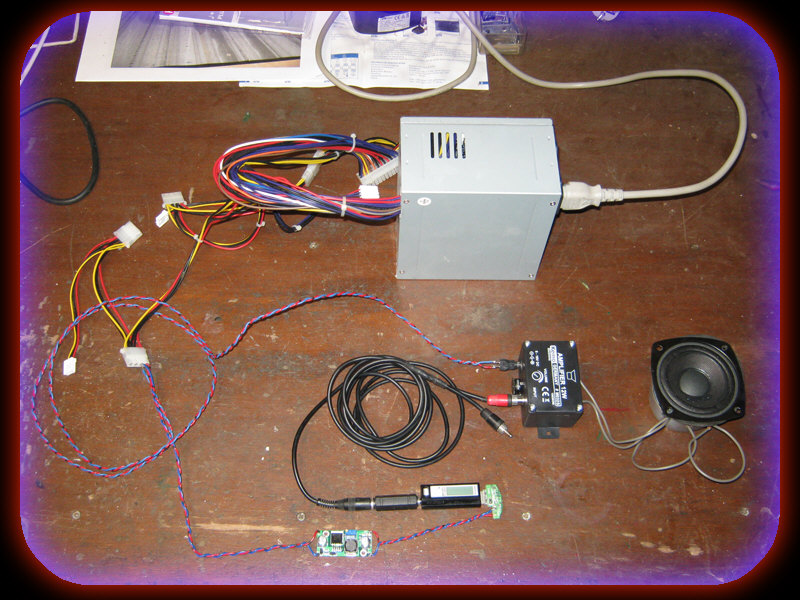
anymore.I also needed suitable voltages for both the mp3-player and the amplifier. And last but not least some external controls like volume, power switch and some of the functions that are available via the GUI of the mp3-player. The picture on the right shows the hardware in a basic functional setup. Main components are the PSU, the mp3-player, audio amplifier module, loudspeaker and one additional component: a DC-DC converter, but more on that later. |
||
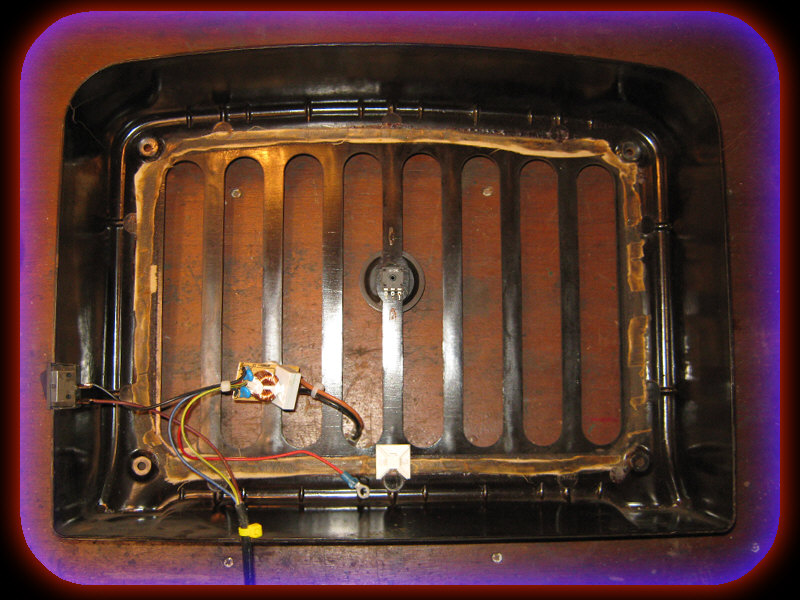
Once these components were tested to work together I opened up the Sihaphon to see how much room was actually available. I removed its "intestines" but left the cone, so there wasn't that much space, hmmmm ... It showed that my PSU was too large and moreover it had way too many wires that I wouldn't be needing anyway. See below the usual looks of a PSU's inside. 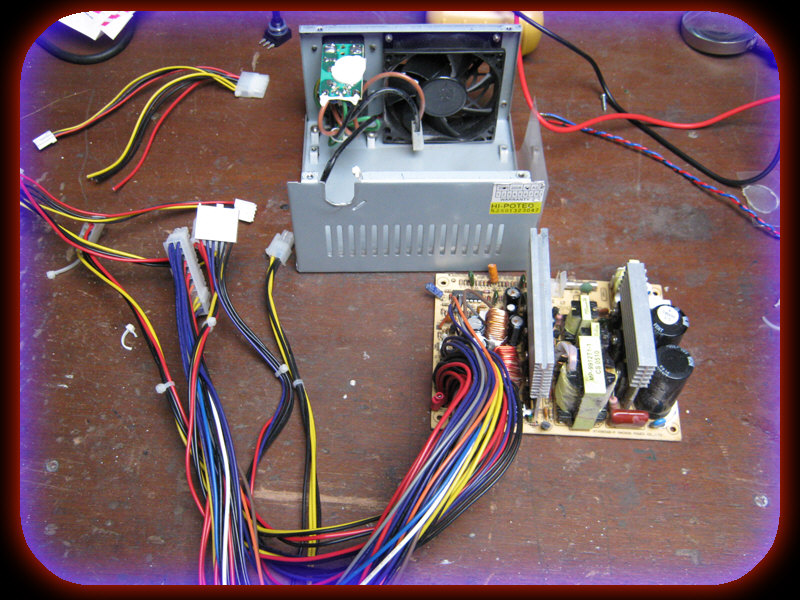 I had to keep it electrically safe and because the sound showed no interference from the PSU (humming, squeaking or whistling) I went ahead. I also disposed of the fan because I figured that the amplifier plus an mp3-player would use much less power than a PC. So the PSU would be highly oversized and not get that hot anyway. |
||
 Next I removed the surplus cables which left me with a single 12V/5V connector, see the picture on the left. The colour codes are: red = +5V, yellow = +12V, orange = 3.3V, blue = -12V, purple = 5V standby, black = Ground. As a side note, but not completely unimportant: When I tested the basic setup I noticed that the PSU would not generate any power, although it was switched on !!! A little internet research showed that these PSU's remain off when they are not connected to a motherboard. There is an easy way to fool a PSU into believing that it is connected. This trick is known as the paperclip test which is commonly used in PC trouble shooting to verify that a standalone PSU is working properly. It boils down to connecting pin 14 of the motherboard connector to ground. That is the purpose of the grey wire in the picture on the left. Intermezzo
|
||
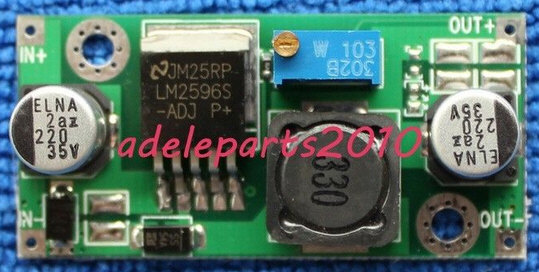
Because a PSU does not provide 1.5V I
bought a "DC-DC Buck Converter Step Down Module LM2596 Power
Supply Output 1.23V-30V" for US$2.45 via eBay. It converts
the 5V down to 1.5V for the MuVO Tx. It's specifications
are:
|
||
|
|
||
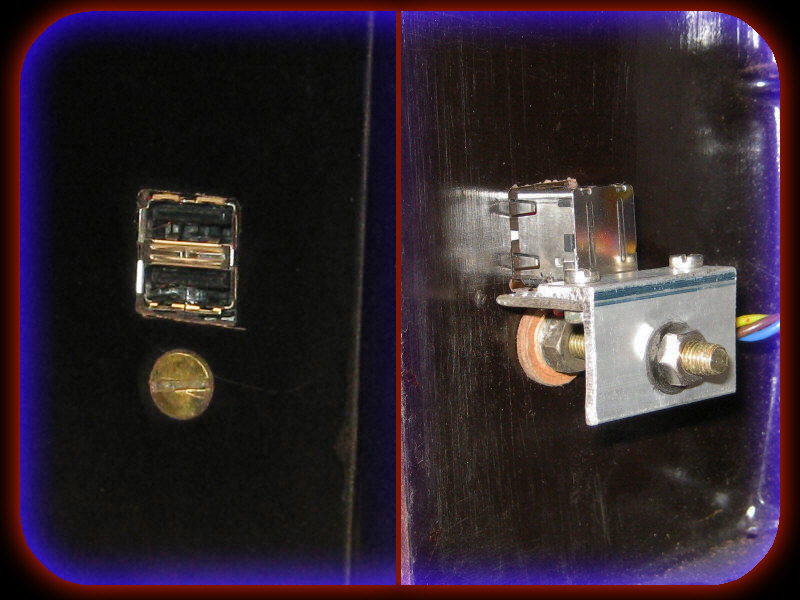 The Challenge: The Challenge:How do I get access to the mp3-player inside this huge box? Now it would be handy to have USB access to the memory to store the music of my choice. That was the easy part. I reused a double USB connector from an old motherboard that I had lying around. Carefully I drilled out square contours in the bakelite speaker housing . That stuff is really brittle so patience is a real virtue here. Then I fixed it with a piece of PCB, a screw and a piece of 90º aluminum profile. Now the hard part: Since the mp3-player doesn't automatically jump to "On" when the power is applied, I needed access to the play button. |
||
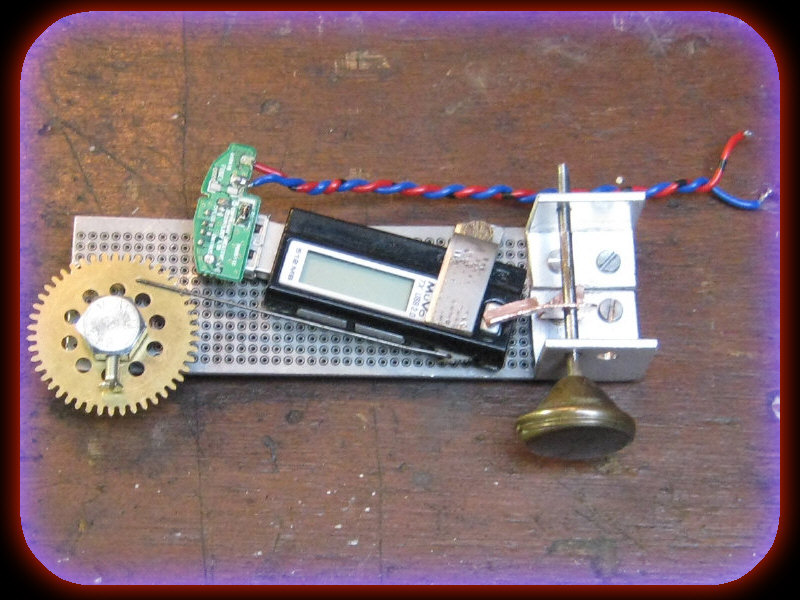 Opening up the plastic
housing of the mp3-player without destroying it, seemed
impossible. So for this I needed a mechanical solution. The
same applied to the little wheel for the backward and
forward functions. Opening up the plastic
housing of the mp3-player without destroying it, seemed
impossible. So for this I needed a mechanical solution. The
same applied to the little wheel for the backward and
forward functions.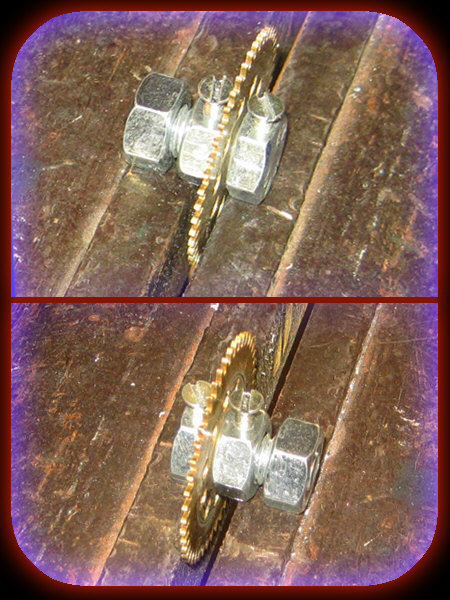 I figured that
I didn't need any other functions. After all it remembers
the playing mode (I programmed it to play songs in a random
order). The volume could be fixed, that would be controlled
via the amplifier anyway. I figured that
I didn't need any other functions. After all it remembers
the playing mode (I programmed it to play songs in a random
order). The volume could be fixed, that would be controlled
via the amplifier anyway.I used a cog from an old clock and a piece of steel wire to access the little wheel by drilling a small hole in the wheel and connecting it to the cog.  A close up of
the construction of the cog is shown to the right. By
turning the cog up and down from the outside I could apply
force to the wheel back and forth. A close up of
the construction of the cog is shown to the right. By
turning the cog up and down from the outside I could apply
force to the wheel back and forth.When you carefully study all the details you can see that I used quite solid parts (M8 bolt, a piece of 3 mm stainless steel, etc.). On top of that I fixed the mp3-player with double-sided adhesive tape. The reason is simply that there isn't much tolerance and I didn't want anything to shift or get loose after a while. Anyway, with the help of a knob from an old oil lamp and a small piece of copper I was able to press the play button by turning the knob slight to the left. I mounted all this stuff on the inside after I cut out the necessary holes in the bakelite speaker housing. Then I soldered the wires from the USB connector to the mp3-player. See the picture on the left for details. Intermezzo
|
||
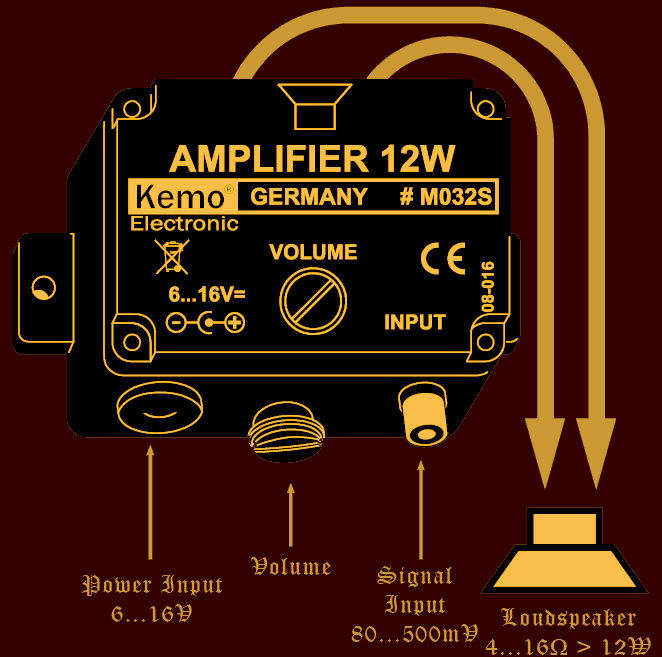 Obviously
the earphone output of an mp3-player does not provide
sufficient signal to feed an external speaker directly. Obviously
the earphone output of an mp3-player does not provide
sufficient signal to feed an external speaker directly.Therefore I bought a small audio amplifier module from Conrad (a web shop with all kind of interesting electronic goodies). It is connected to a 4Ω speaker that I mounted in a wooden box. (If you don't do that it sounds too soft due to the missing resonance areas). The amplifier's specifications are:
|
||
|
||
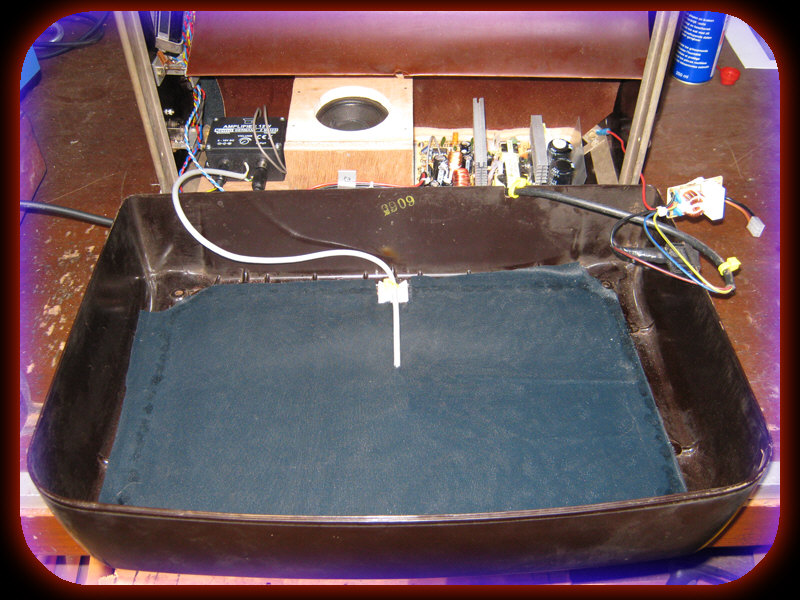
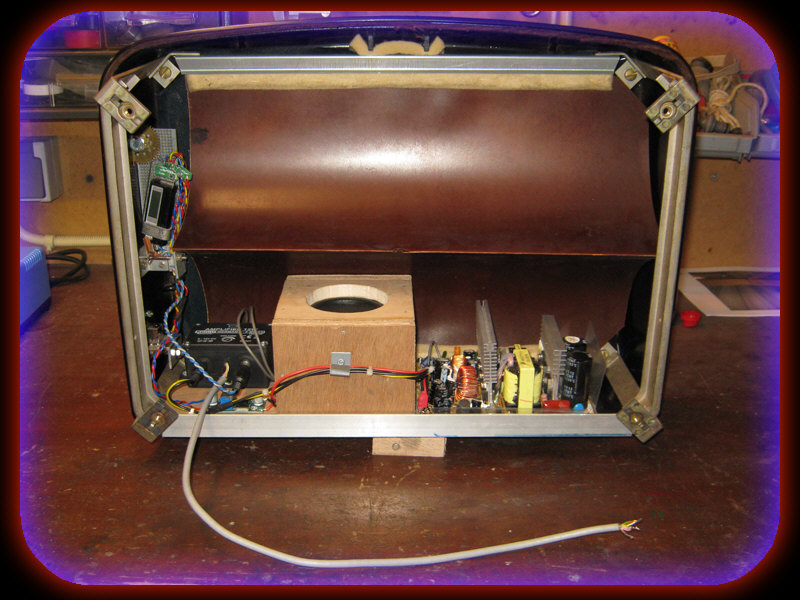 From now on the project went
pretty straightforward. From now on the project went
pretty straightforward.As a basis to bring it all together I used a wooden plank to mount the stuff on: From right to left you see the PSU, the speaker box, the amplifier and the DC-DC-converter mounted inside the steel frame of the Sihaphon. 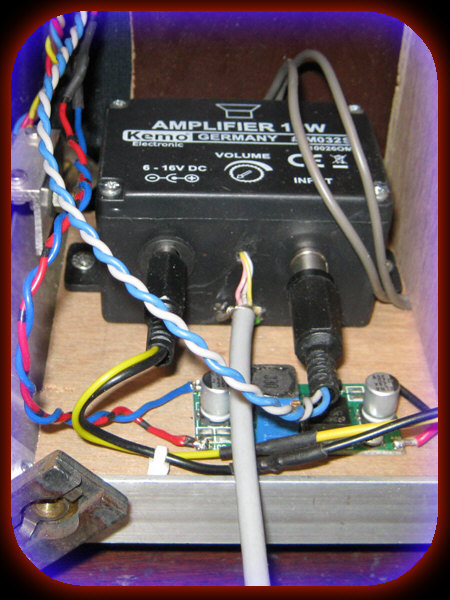 I needed
external access for the volume control. I needed
external access for the volume control.As you can see on the right, the external volume regulator was removed and a shielded wire was attached. 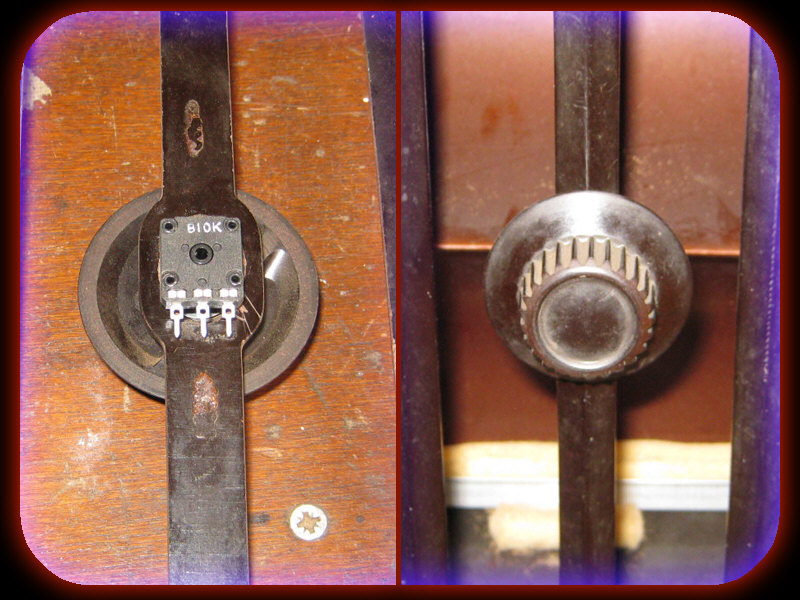 A separate 10 kΩ potentiometer was mounted on the position of the original regulator at the back. Wrapping up this design included the addition of an on/off switch, a power cord and the mains filter that was inside the PSU. Since I couldn't find a switch with a decent steampunk look, I used a regular rocker switch (after all: safety first). The frame is connected to ground for additional safety. |
||
|
||
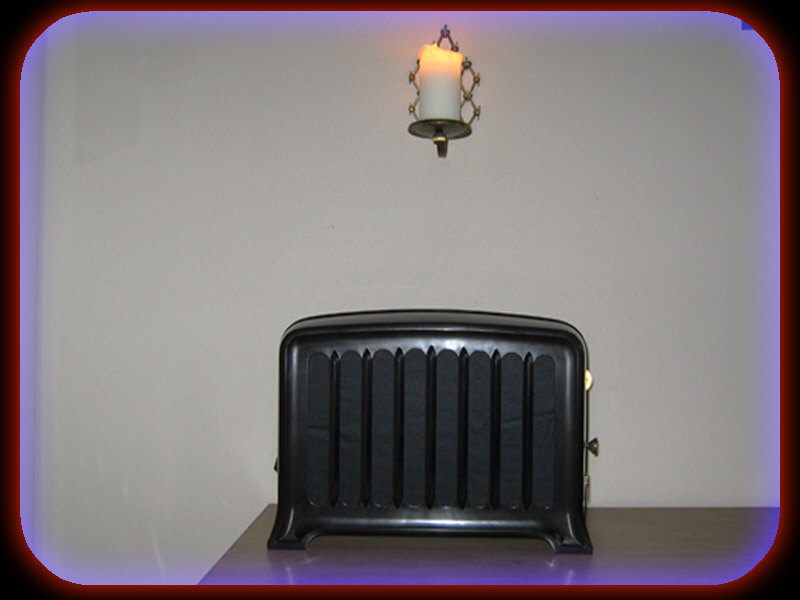
| The last step was to apply
some lining to the front panel and the back panel of the
Sihaphon and to put it all back together again. A little
polishing and my third steampunk project was a fact. |
||
|