
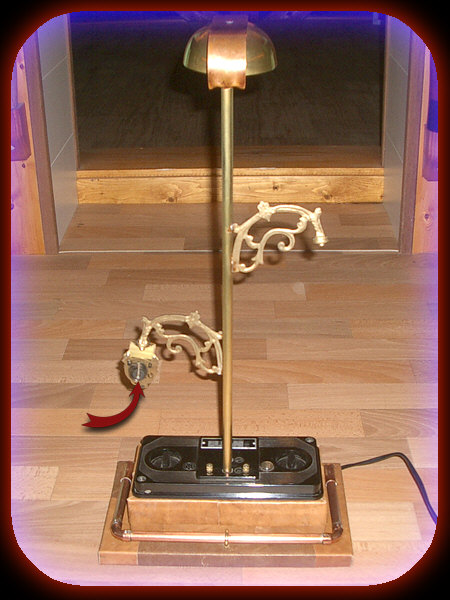
A multi functional desk lamp. A candle is available until electricity has been invented
|
A multi functional desk lamp. A candle is available until electricity has been invented |
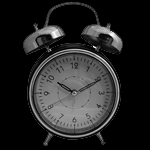  The main ingredients of this desk lamp are an old bakelite fusebox from our home meter cupboard, the electrical parts of a broken halogen desk lamp and an alarm clock. You know, the alarm clock that stands next to your bed, and which is so annoying in the morning, yet you can't afford not to use it. OK, here we go ...
|
||
|
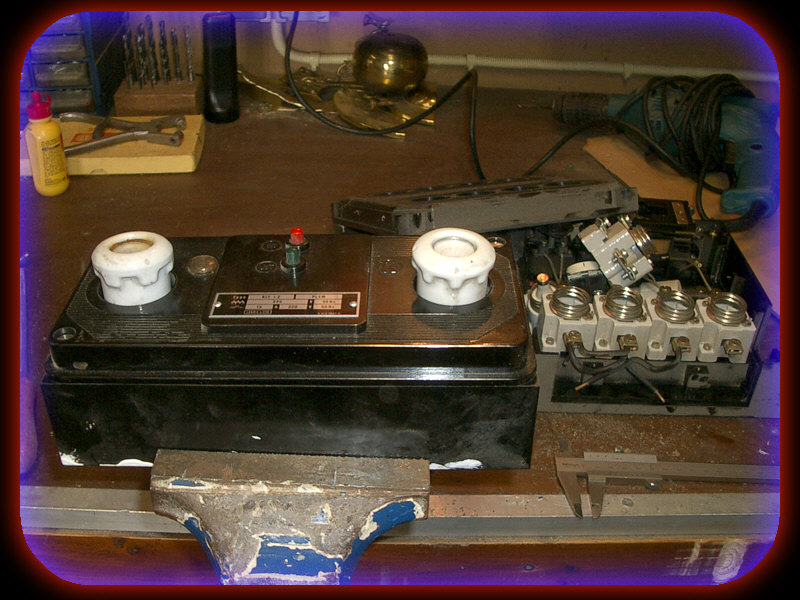
I took the old fuse box,
shown in the vise, on the left, and I removed the two
fuses and fuse holders and basically emptied it
completely. On the work bench you see some other fuse
box parts lying around. From those I took two switches.
  < < |
||
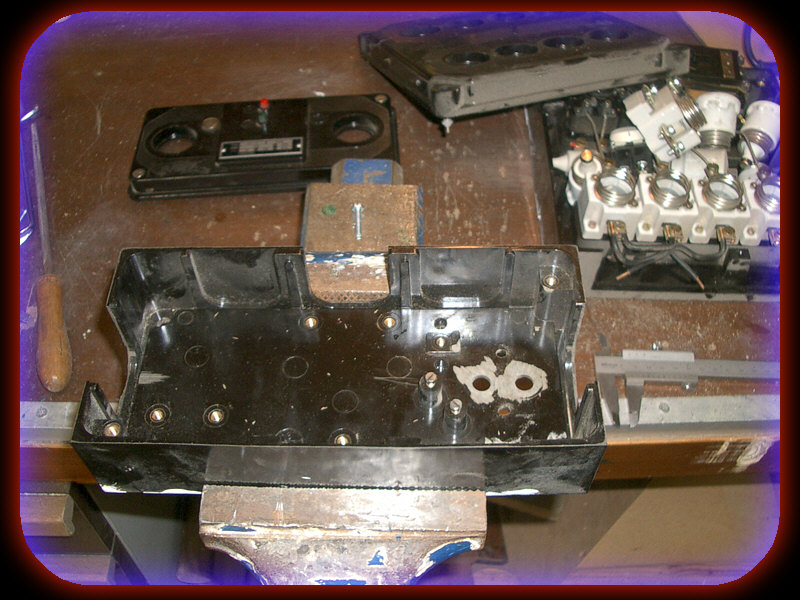
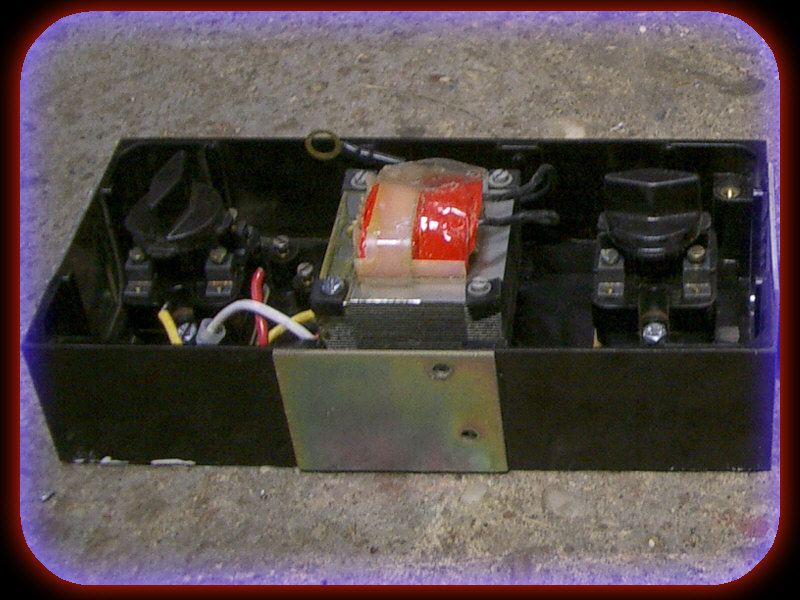
Below you see the two
switches mounted. After removing the red and green push
buttons I had two small holes available in the top lid.
Unfortunately there were large holes in three sides of the
box. They were used for the inlet of necessary wiring of
course but now it was a bit of a pain as this box was going
to be the main compartment for the switches and the
transformer. With some industrial glue I glued some small
pieces of metal to the outside.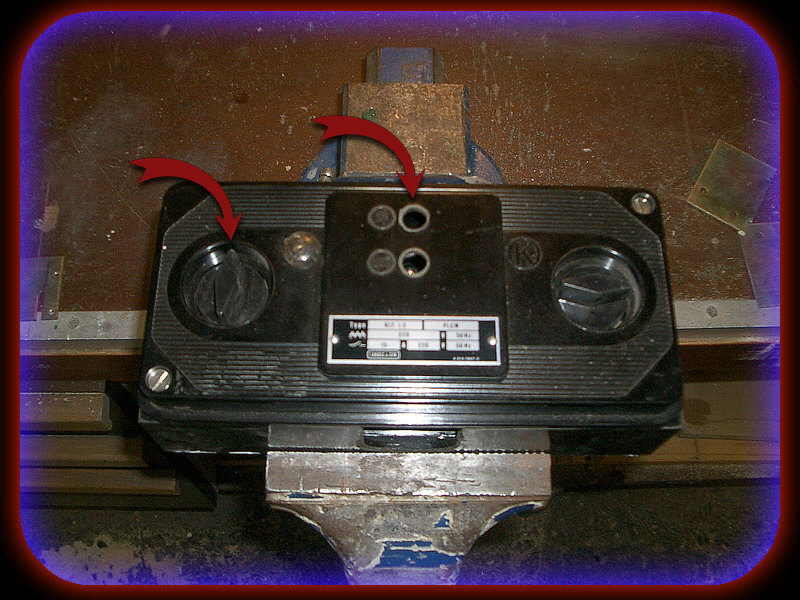
 |
||
We are thinking steampunk right? So we need some pipes to convey steam. Through the holes in the top lid I mounted two small brass pipes that I soldered to a piece of sheet metal on the inside. 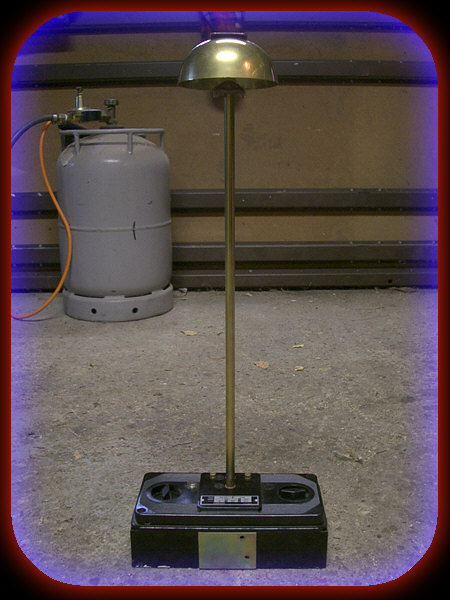  The sheet metal
was screwed to the lid. I used this way of construction
because the pipes must be mounted firmly and at the same
time bakelite is not flexible at all and will crack easily. The sheet metal
was screwed to the lid. I used this way of construction
because the pipes must be mounted firmly and at the same
time bakelite is not flexible at all and will crack easily.On the inside you can see the hole of one of the pipes. The wiring will go through this hole to the top of the lamp. I also had a small brass cup lying around that I soldered upside down to the other end of the brass pipes. This will hold the light bulb later on. |
||
|
Because the lamp is rather
tall compared to its width I wanted a larger base. Some
scrap wood served well.
I had some tatty leather left over from the CD cabinet that
I constructed earlier. That worked perfectly for the base of
the lamp too. I left the bakelite lid untouched to add an
atmosphere of antique.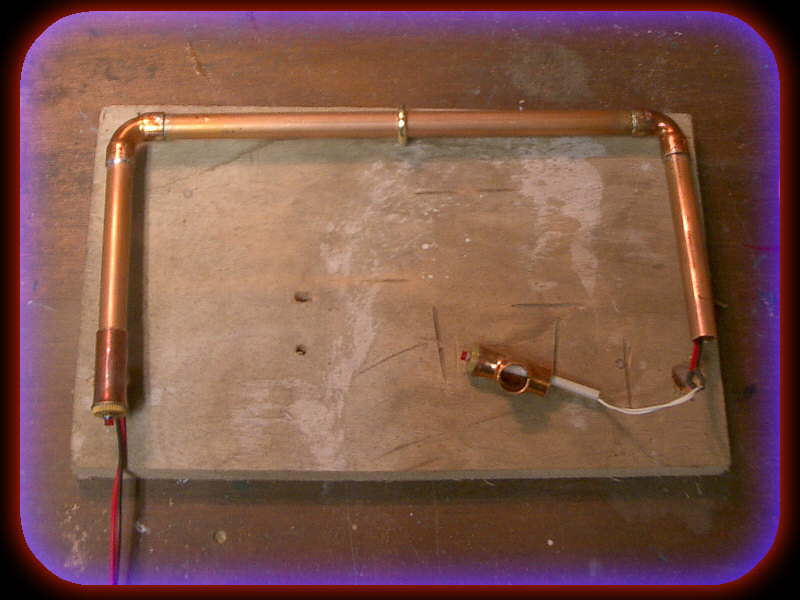 Decorative
pipes were cut and soldered together. At the ends two
small neon lights were mounted. The ones that work
directly on the mains. The wires go through the pipes
again. Decorative
pipes were cut and soldered together. At the ends two
small neon lights were mounted. The ones that work
directly on the mains. The wires go through the pipes
again.
|
||
  Now
that the bare construction was ready and all the wiring was
done I wanted to add some more decorative elements. The
curved brass side parts were a leftover from the lamp that I
used for the CD cabinet earlier. Now
that the bare construction was ready and all the wiring was
done I wanted to add some more decorative elements. The
curved brass side parts were a leftover from the lamp that I
used for the CD cabinet earlier.On one end I mounted the inside of an old, completely mechanical, egg-timer. It can be wound on the back. When it unwinds, it produces a rattling sound. Because it is screwed firmly to the curvy side part, which is soldered to the brass pipes, the rattling of the cogs is amplified by the metal parts of the lamp. You know when the eggs are ready when the rattling stops. |
||
Because the mains cord was all plastic I couldn't really use it as such. I bougth extra long shoe laces for climbing boots. They consist of strong inner cords covered by a woven outside. I removed the inner cords and inserted the electrical wires instead. It now looked more like the older electrical wires with the cotton coats. More decoration was added by a brass candle stand, a match box and a candle extinguisher. I also needed a clockface so I cut out a copper disk from sheet copper.  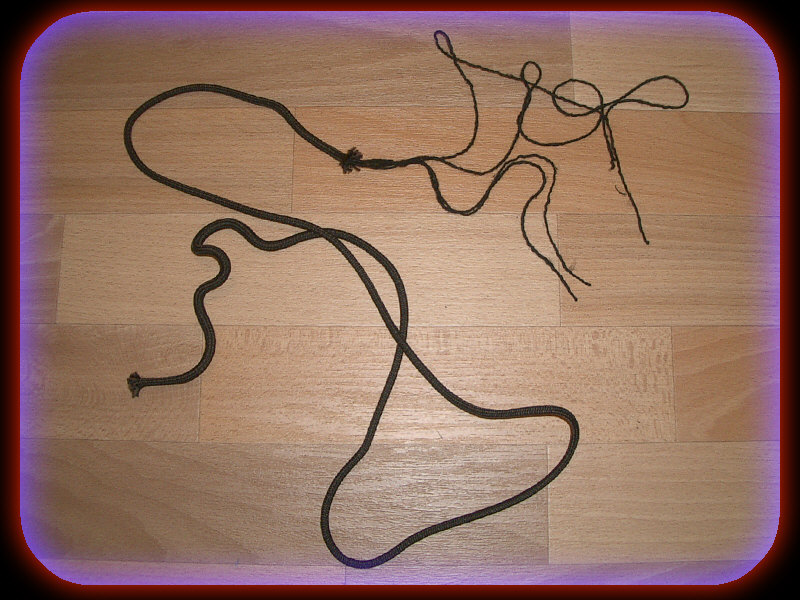 |
||
From the alarm clock housing I constructed a photo frame and mounted it on the other side to restore symmetry. Amazing what a bit of polishing does. I put some marks on the clock face to indicate 1 minute intervals and inserted a candle. Done. 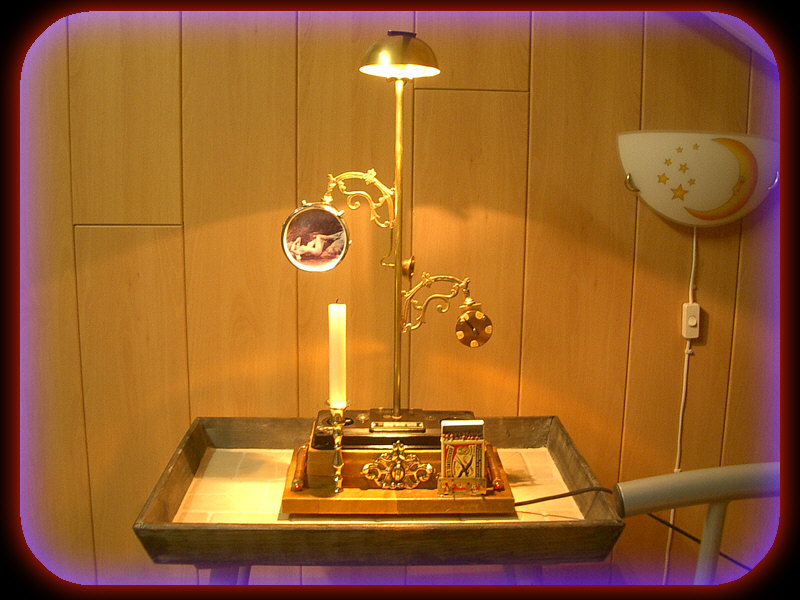 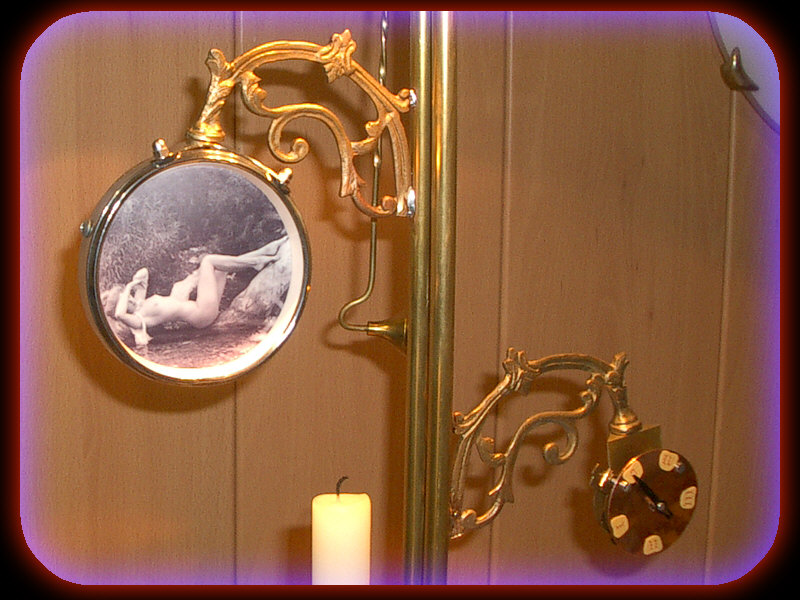 |
||
A look on the back. The candle extinguisher is
hanging on a hook. |
The bulb lights up in the
future when electricity is invented.
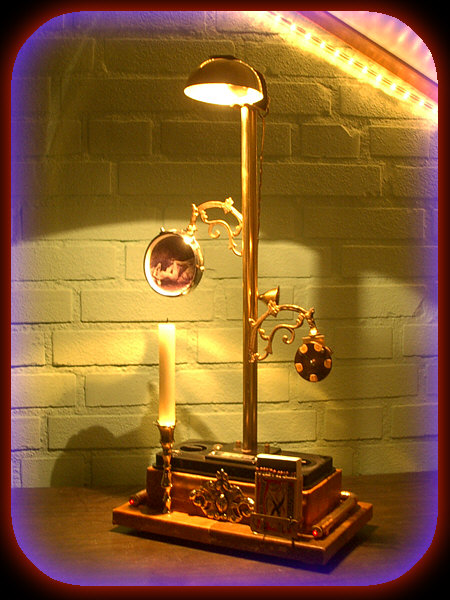 |
But then again the candle
will do nicely for another century !!!
 |